How to install owncloud 9 on centos 7
In this guide, we'll walk you through the steps to install OwnCloud 9 on a CentOS 7 server using a bash script. OwnCloud is a powerful open-source platform for file sharing and data synchronization that allows you to manage your files securely.
Prerequisites
Before we start, make sure you have the following:
- A CentOS 7 server with root access.
- Basic knowledge of using the command line.
Steps to Install OwnCloud 9 on CentOS 7
Here's how you can set up OwnCloud 9 on your CentOS 7 server:
1. Update CentOS 7
The first step is to ensure your system is up to date. Run the following commands:
#!/bin/bash
# Update CentOS 7
echo -e "Updating packages for CentOS 7\n"
yum install -y vim wget
yum -y update
This will install essential packages like vim and wget, and update your system to the latest package versions.
2. Install MariaDB Server
MariaDB is a popular database server that OwnCloud will use to store data. Install and configure MariaDB with the following commands:
# Install MariaDB server
echo -e "Installing MariaDB server for CentOS 7\n"
yum install -y mariadb-server
systemctl enable mariadb
systemctl start mariadb
3. Set Root Password for MariaDB
For security purposes, it's crucial to set a root password for your MariaDB server:
# Set root password for MariaDB
echo -e "Setting root password for MariaDB\n"
mysqld_safe --skip-grant-tables --skip-networking & 1>/dev/null
mysql -u root -e 'FLUSH PRIVILEGES;'
mysql -u root -e "SET PASSWORD FOR 'root'@'localhost' = PASSWORD('123456789');"
mysql -u root -p'123456789' -e "show databases;"
4. Install OwnCloud 9
Next, you need to install OwnCloud 9. We'll use the EPEL repository for this:
# Install OwnCloud
echo -e "Installing OwnCloud 9\n"
yum --enablerepo=epel -y install php-pear-MDB2-Driver-mysqli php-pear-Net-Curl
wget http://download.owncloud.org/download/repositories/stable/CentOS_7/ce:stable.repo -P /etc/yum.repos.d
yum -y install owncloud
systemctl restart httpd
5. Configure MariaDB for OwnCloud
Create a database and user specifically for OwnCloud:
# Add user and database for OwnCloud in MariaDB
mysql -u root -p'123456789' -e 'show databases;'
mysql -u root -p'123456789' -e 'create database owncloud;'
mysql -u root -p'123456789' -e "grant all privileges on owncloud.* to clouddbuser@'localhost' identified by 'password123';"
mysql -u root -p'123456789' -e 'flush privileges;'
mysql -u root -p'123456789' -e 'show databases;'
6. Configure SELinux (If Enabled)
If SELinux is enabled on your system, you will need to configure it to allow OwnCloud to function properly:
# SELinux configuration
semanage fcontext -a -t httpd_sys_rw_content_t /var/www/html/owncloud/apps
semanage fcontext -a -t httpd_sys_rw_content_t /var/www/html/owncloud/config
restorecon /var/www/html/owncloud/apps
restorecon /var/www/html/owncloud/config
systemctl enable httpd
systemctl start httpd
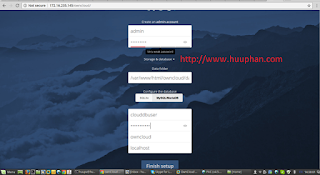
7. Finish Installation
Once everything is set up, you can access OwnCloud via your web browser:
# Access OwnCloud
echo -e "Finish installing OwnCloud\n"
echo -e "Access OwnCloud via the following URL:\n"
echo -e "http://<your-server-ip>/owncloud/ or http://<your-server-hostname>/owncloud/ from a client computer with a web browser."
Conclusion
Congratulations! You've successfully installed OwnCloud 9 on your CentOS 7 server. You can now manage your files and share them securely using your new OwnCloud installation.
Links You May Like:
For more tutorials and guides, visit www.huuphan.com.

Comments
Post a Comment